Admin Menu
The Admin Menu on your site is the main tool for navigating data and content management. Get familiar with the Admin Menu as a first step to mastering your DKAN site.
When you’re logged onto the site, you’ll see a black navigation bar at the top of the page. This is the Admin Menu. As a Site Manager, this menu looks different for you than other roles on the site. Editors and Content Creators have fewer options because they have fewer permissions on the site.
Use the Admin Menu as your anchor on your DKAN site. Everything you can do on the site is accessed through the Admin Menu.
Admin Menu Items

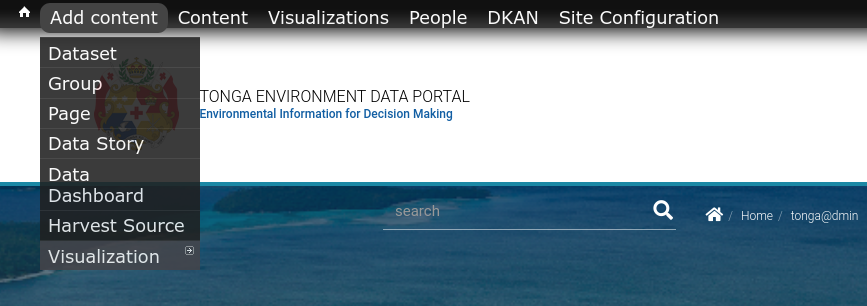
Add Content
Add Content is shortcuts menu item for creating new content. Click on Add Content to go to a page of available content types to create or simply choose from the drop-down menu. As a Site Manager, you have permissions to create all the content types possible.

Content
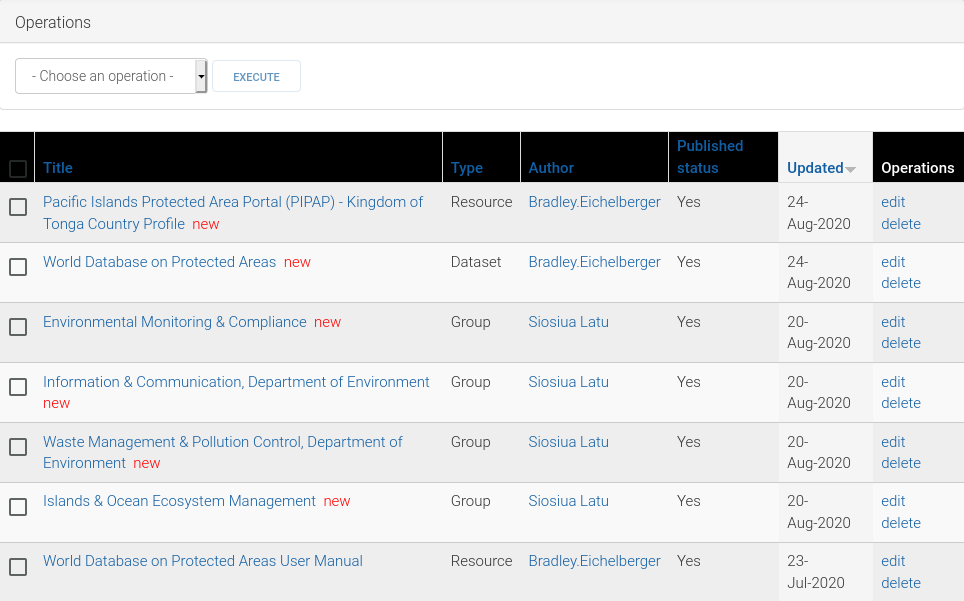
Click on the Content menu item to access all the content that exists on the site. As the Site Manager, you have access to create all the content types possible as well as edit, unpublish, and delete all existing content regardless of who the author is. You can create new content from this page as well as manage all the existing content and files on your DKAN site from here. Files include things like images, videos, font files for icons, other graphics, etc.
In smaller organizations, Site Managers may both be writing and editing their own content to then directly publish the content to the live site. Larger organizations may have people in other roles like Editors and Content Creators to help with handling a large mass of content on the site. Depending on the scale of your organization and volume of content, you may spend more or less time directly handling content.

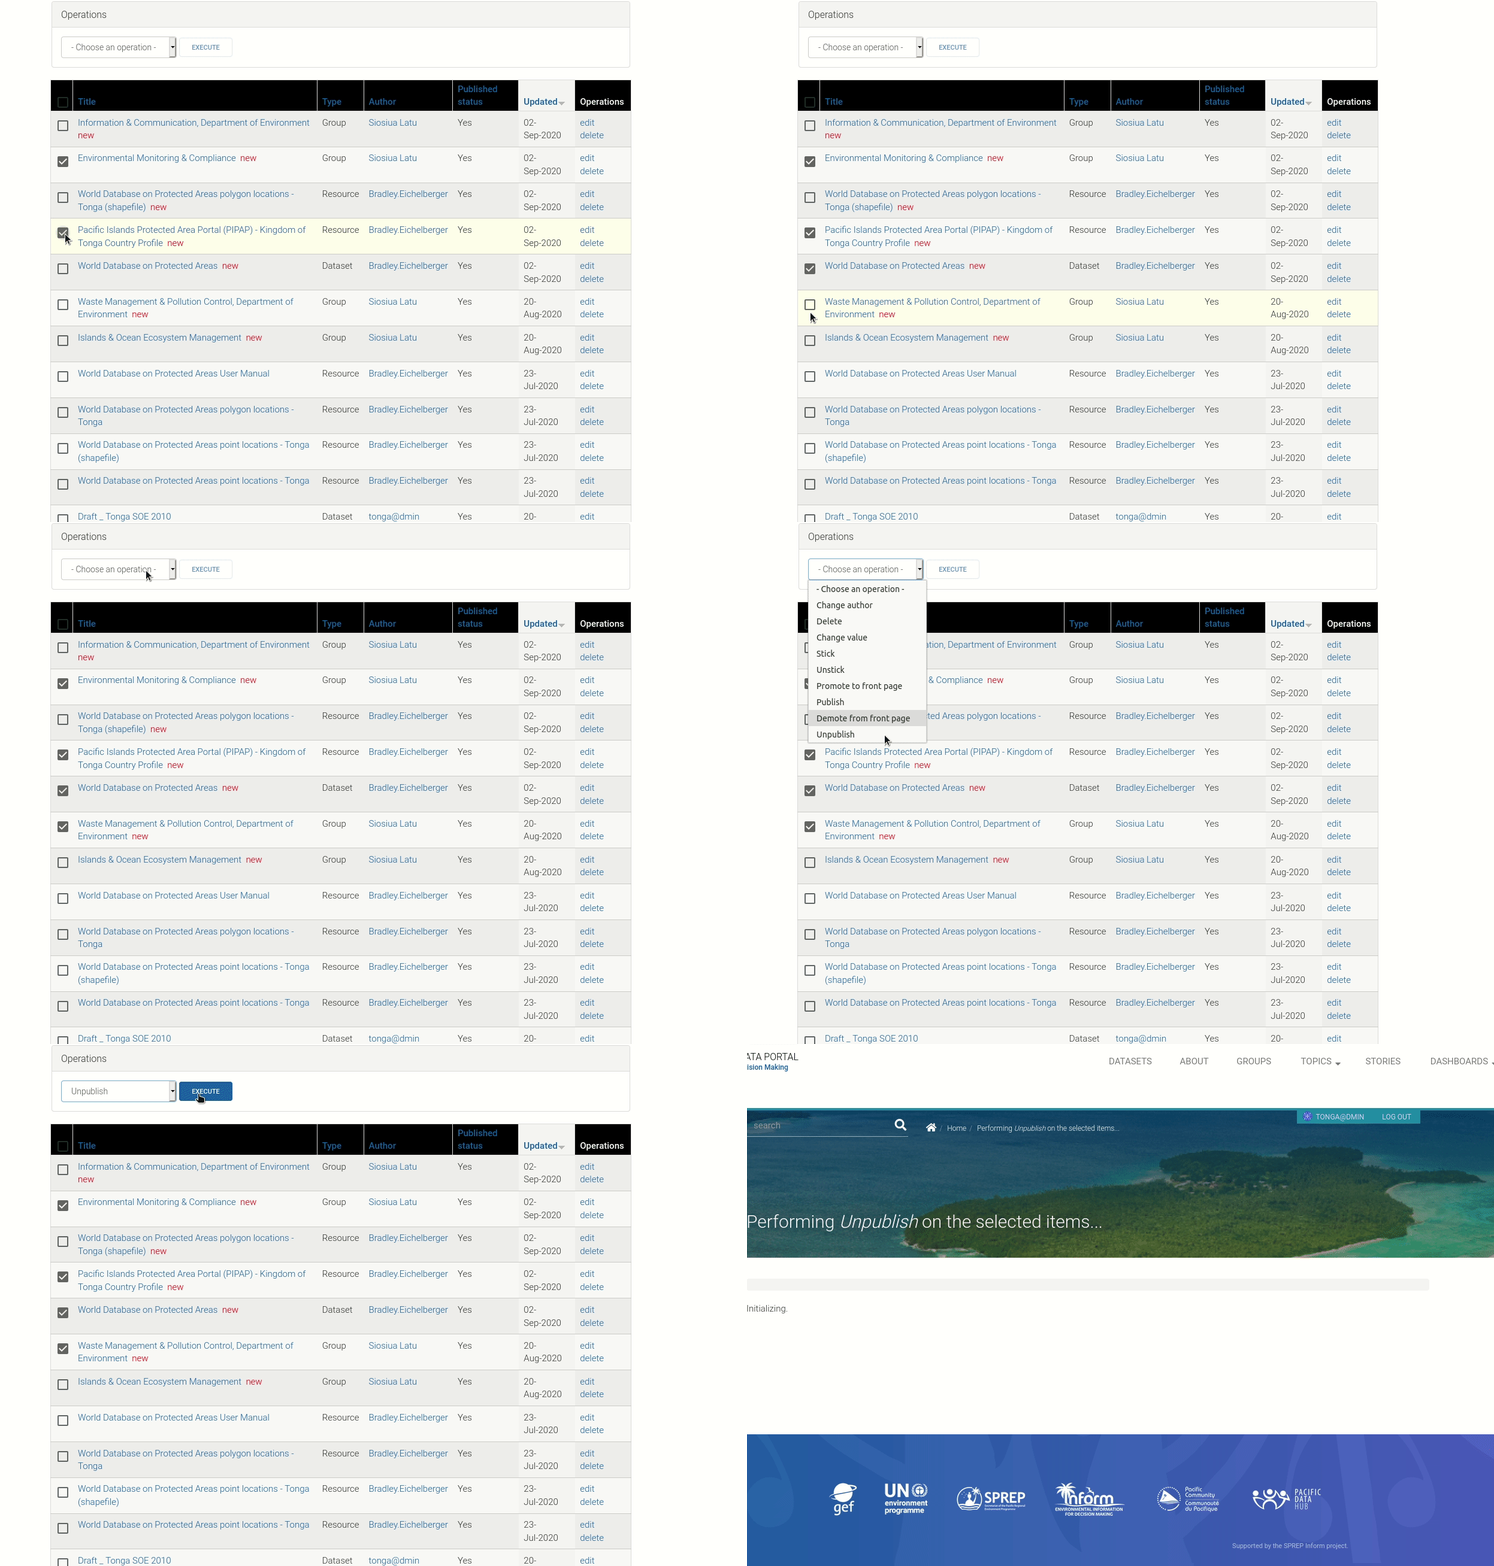
In any scenario, as a Site Manager you can use this page to look at the content on the site to see who created a particular piece of content, when it was last updated, its status (published or unpublished) and take action on existing content. You can handle individual pieces of content, but you can also perform “bulk actions”. This is a particularly useful function especially when dealing with a high volume of content. From this page you can take the same action on several different pieces of content by simply checking the boxes on the left, selecting an update option and clicking the Update button.
In the example below, the Site Manager is selecting a few pieces of content to perform a single action on. The Site Manager is able to unpublish 3 pieces of content at the same time by using bulk actions. While the example is simple, this function becomes helpful on site that contain thousands of pieces of content.

People
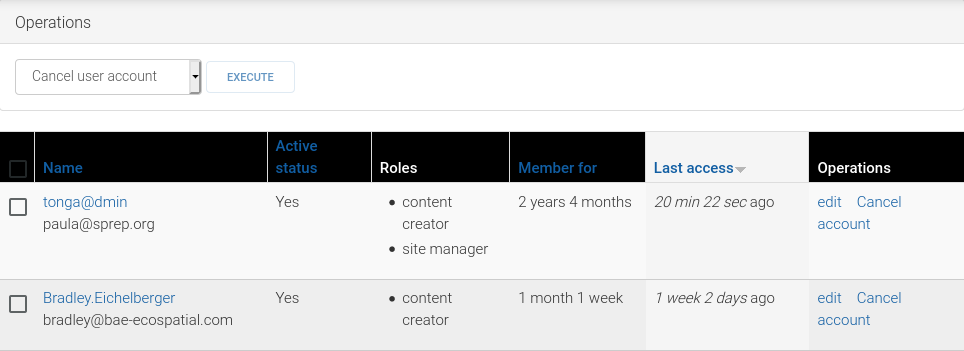
The People main page gives you all the information about the users on your DKAN site including the username and role as well as the length of the account and when the user last accessed their account. This high-level view is especially helpful for managing a large number of accounts and performing “bulk actions”.
Sort the order of info columns by clicking the title link. In other words you can sort A-Z by clicking the Username title link You can use filters and combinations of filters to search for users with specific roles, permissions, and status.
Make bulk actions to users by selecting the checkboxes on the the far left of the page, choosing an action from the Update options menu and clicking the Update button.

DKAN
From the DKAN menu, Site Managers can access some of the more technical operations of DKAN. DKAN is the technical engine that powers DKAN, and the available options in this menu are customized to DKAN and open data publishing.
Use the DKAN menu item to add APIs, enable External Previews, access the Harvest dashboard, manage the Recline configuration, and more.
Site Configuration
These options let you manage general settings of certain features on your DKAN site like how user accounts are set up, search options, which fonts are applied to the text on the site and more. These settings determine how lower-access users interact with the site and give you flexibility to change the default behavior.
Click the Site Configuration menu item to see all the configuration options.